Posts

Showing posts from September, 2018

Fixing our mistakes. (week 6)

Image
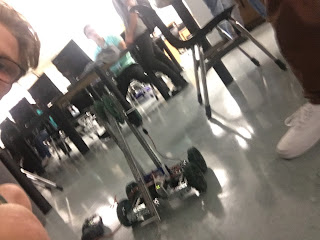
We have now removed the medium gears for large ones and moved the large gears down on the arm to make sure it fits. We can now move the arm again and are ready to program. I believe we should be able to complete the challenge by next class.

We messed up the arm! (week 6)

Image
In trying to meet the parameters of 18x18 i replaced my large gears for medium gears. While the robot meets the parameters now, the arm cannot move. I didn't think about this before but by removing the large gears there is no place to slide the second axle that forces the arm up. Back to the drawing board. 

Re- adjusting the program ( week 5 )

Image
So we had to make the arm go up and make it stay up so we had to re program the arm. So what we did was change one of the codes from zero to twenty and that kept the arm staying up. Because of this we were able to put the tetrahedron onto the pyramid.

Programming the arm (week 5)

Image
Today we were working on programming the arm its self. The codes weren't that hard after we figured it out. It was simple we added another motor and its basically like programming the wheels but instead with the arm you have to choose which bottom you wan to place it on and chance the speed in which the arm is going to be moving on.

starting the arm (week 4)

Image
To figure out how to do the arm we had to came up with the right measurements of the tubes that we had to use. It couldn't be to heavy or else the robot would fall over because of the way of the extended arm. We came up with putting a 30 for the long arm and attaching a small hook in the end of a tube. We attached a motor to the arm so it could power it. All we have to do is program it and test it out.   

The Arm!!! (week 4)

Image
Today we're working on our arm. So far we've completed driving the robot manually and autonomously. The arm we are building is hook-like. its built almost like a fishing hook. The challenge we have to complete is moving pyramids onto a set location. so far we have it done but we're putting finishing touches on it. hopefully we succeed our first time around.

Printing battery clip (week 3)

Image
We have learned how to print our own battery clips in the 3D printer. Printing it from the website makes it easier for us because it already comes with all the dimensions etc. We did it going to the vex website, downloading the part and converting it into an STL file into solid-works. After that we go into slicer making it an G code file and we print out the clips to hold our robots batteries. We made four battery clips in total.

ISSA GHOST (week 3)

Image
Autonomous... Programming the robot to drive autonomously was very tedious to say the least. The coding itself wasn't too bad, the bad part was the timing. Whenever we thought we knew how long each code should be it would say YEET!! We eventually realized the voltage in your battery had a large effect on the timing on your code. That is when we learned to use a multi-meter to gauge our voltage.